You can copy the CLP Series radio settings from one radio (the source) to a second radio using the CLP Series Multi-Unit Charger (optional accessory). A multi-channel radio can be cloned to a single channel radio BUT only the first channel is cloned. The Multi-Unit Charger (MUC) does not have to be plugged in for cloning, but both radios require charged batteries.
Note: The enhanced CLP software also uses the LED to indicate “pass” or “fail” status during cloning. Green LED during cloning indicates “pass” status and red LED during cloning indicates “fail” status.
- To put the source radio into clone mode, press and hold PTT and the “-” button while turning the radio ON until you hear the Cloning Tone and Double Blinking Yellow on the Smart Status Glow.
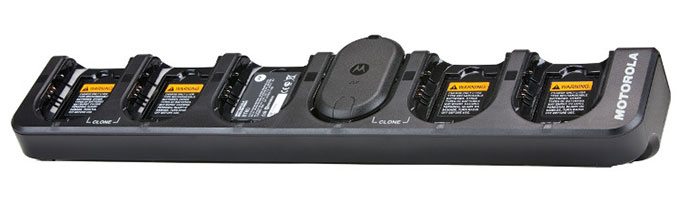
- Place the source radio into one of the charging pockets that has the “CLONE” label.
- Turn the target radio ON and place it in the pairing charging pocket that has the “CLONE” label and start the cloning process.
- Press the “Menu” button on the source radio to start the cloning process. The source radio generates the start clone tone.
- Once the cloning is completed, turn the target radio OFF and back ON again in order to activate the radio.
- To clone another radio, repeat steps 3, 4 and 5.
- To exit clone mode on the source radio, turn the radio OFF.
What to do if cloning fails
The radio emits an audible “bonk” indicating that the cloning process has failed. In the event that cloning fails, try performing each of the following before trying to start the cloning process again.
- Make sure that the radio batteries on both radios are fully charged.
- Make sure that the battery is engaged properly on to the radio.
- Make sure that there is no debris in the charging tray or on the radio contacts.
- Verify that the source radio is in cloning mode.
- Make sure that the radio to be cloned is turned ON.
- Make sure that radios are both from the same type (same frequency band, same region and same transmission power).