On Cue that can be customized to better fit your restaurant's needs. On the top left corner, tap the blue list icon to open the menu where you can access your different views: Guest Lis and Tables, Settings: Preferences, Account, Devices and Tables and More. Select Preferences to set up your wait list.
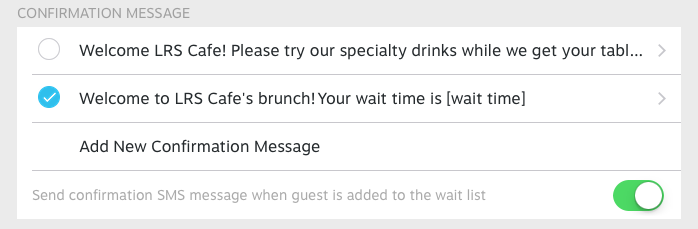
Confirmation messages
For guests being notified via text message on their phones, a confirmation message can be turned on and off from the Settings options. When ON, a confirmation message is sent to the guest once they are added to the wait list with the quoted wait time. This message helps confirm the appropriate phone number was captured, reassures the guest they have been added, and re-states the quoted waited time. The default Confirmation Message is: “You’ve been added to the wait list. Your wait time is [wait time].” You can edit this message and add different ones as well. We strongly recommend turning the confirmation messages on.
Notification messages
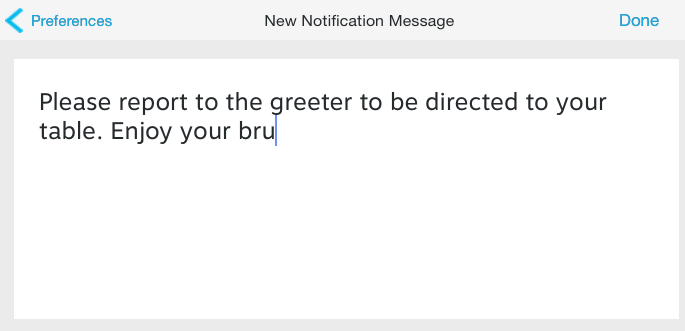
The message sent to guests notifying them that their table is ready can be either manually pushed to guests by the host or automatically sent based on quoted time. Depending on how confident you are quoting wait times, you can enable notification messages to guests to be sent automatically at quoted wait time, preventing the host from having to notify guests manually. “Please report to the greeter to be directed to your table” is the default message which can be changed up to a maximum of 160 characters.

Add a new Confirmation or Notification message by tapping on the Add New.... row. This will take you to a new screen where you can compose your new message.
Messages can be edited by tapping on them, make the desired changes and hit Done or navigate back by selecting Preferences.
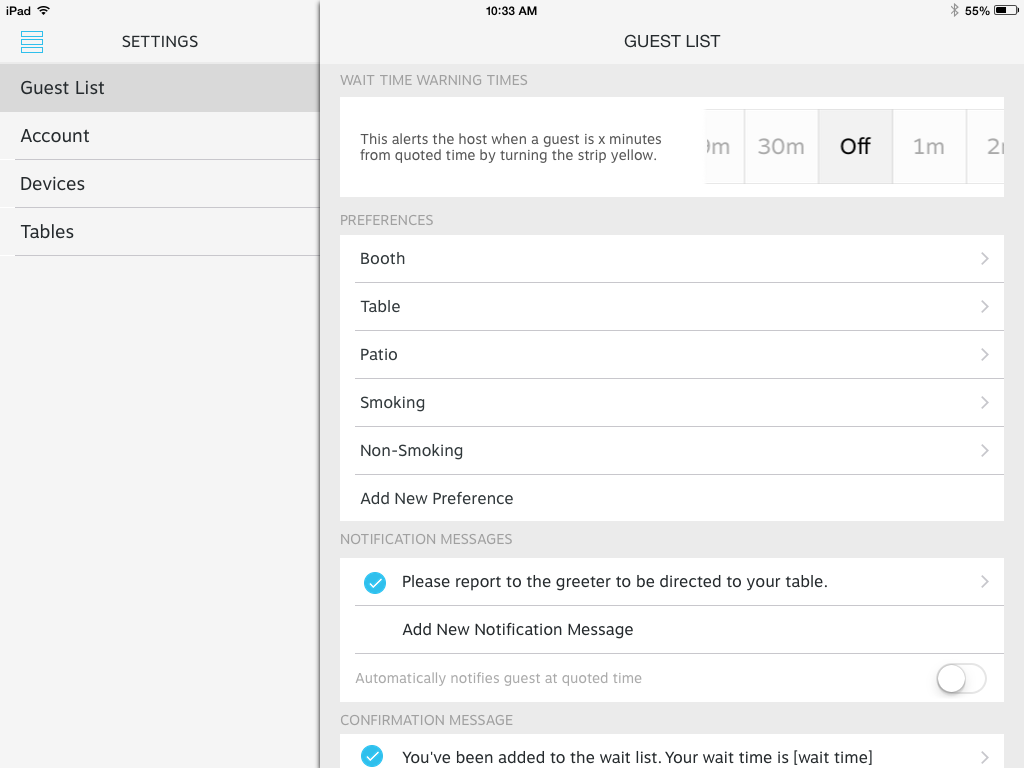
Wait Time Warning Times
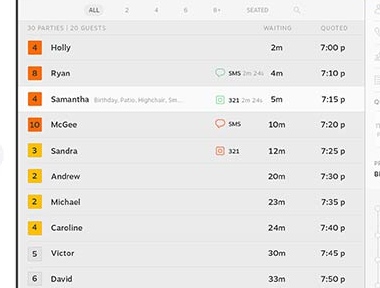
Wait Time Warning Times can be changed to help you manage quoted times. A host can be alerted when a quoted wait time is coming up by changing the status indicator from gray to yellow. This warning helps the host prioritize guests whose quoted wait time is approaching so they can be notified first. Once the initial estimated time or quoted time has been exceeded the status indicator turns red.
Depending on your restaurant, you may give your host a 5 or 10 minute warning. You can find this setting in the Guest List section of the Settings Screen. The threshold times are available in one minute increments and go all the way up to 30 minutes. The default upon downloading the app is set at zero or off.
Preferences
You can also add or delete any preferences. The apps default preferences correlate to seating areas: Booth, Table, Patio, Smoking and Non-Smoking. To add a preference, simply tap the +Add button, enter the new preference option and then hit Save. More than one preference per guest can be selected. Preferences can easily be deleted as well by clicking on the Delete to the right of the option. In the Settings screen, only two Preferences are visible at first glance, but you can scroll to see them rest.
Clearing the guest list
At the bottom of the Settings screen is a Clear Guest List button. This will clear all guests from the lists. When selected it will prompt a confirmation question “Are you sure you want to delete the entire Guest List?” The Guest List is set to automatically clear every 24 hours.
