
Once you have verified the preset for your system follow the steps below to add and associate a new Znode to your Windows Table Tracker:
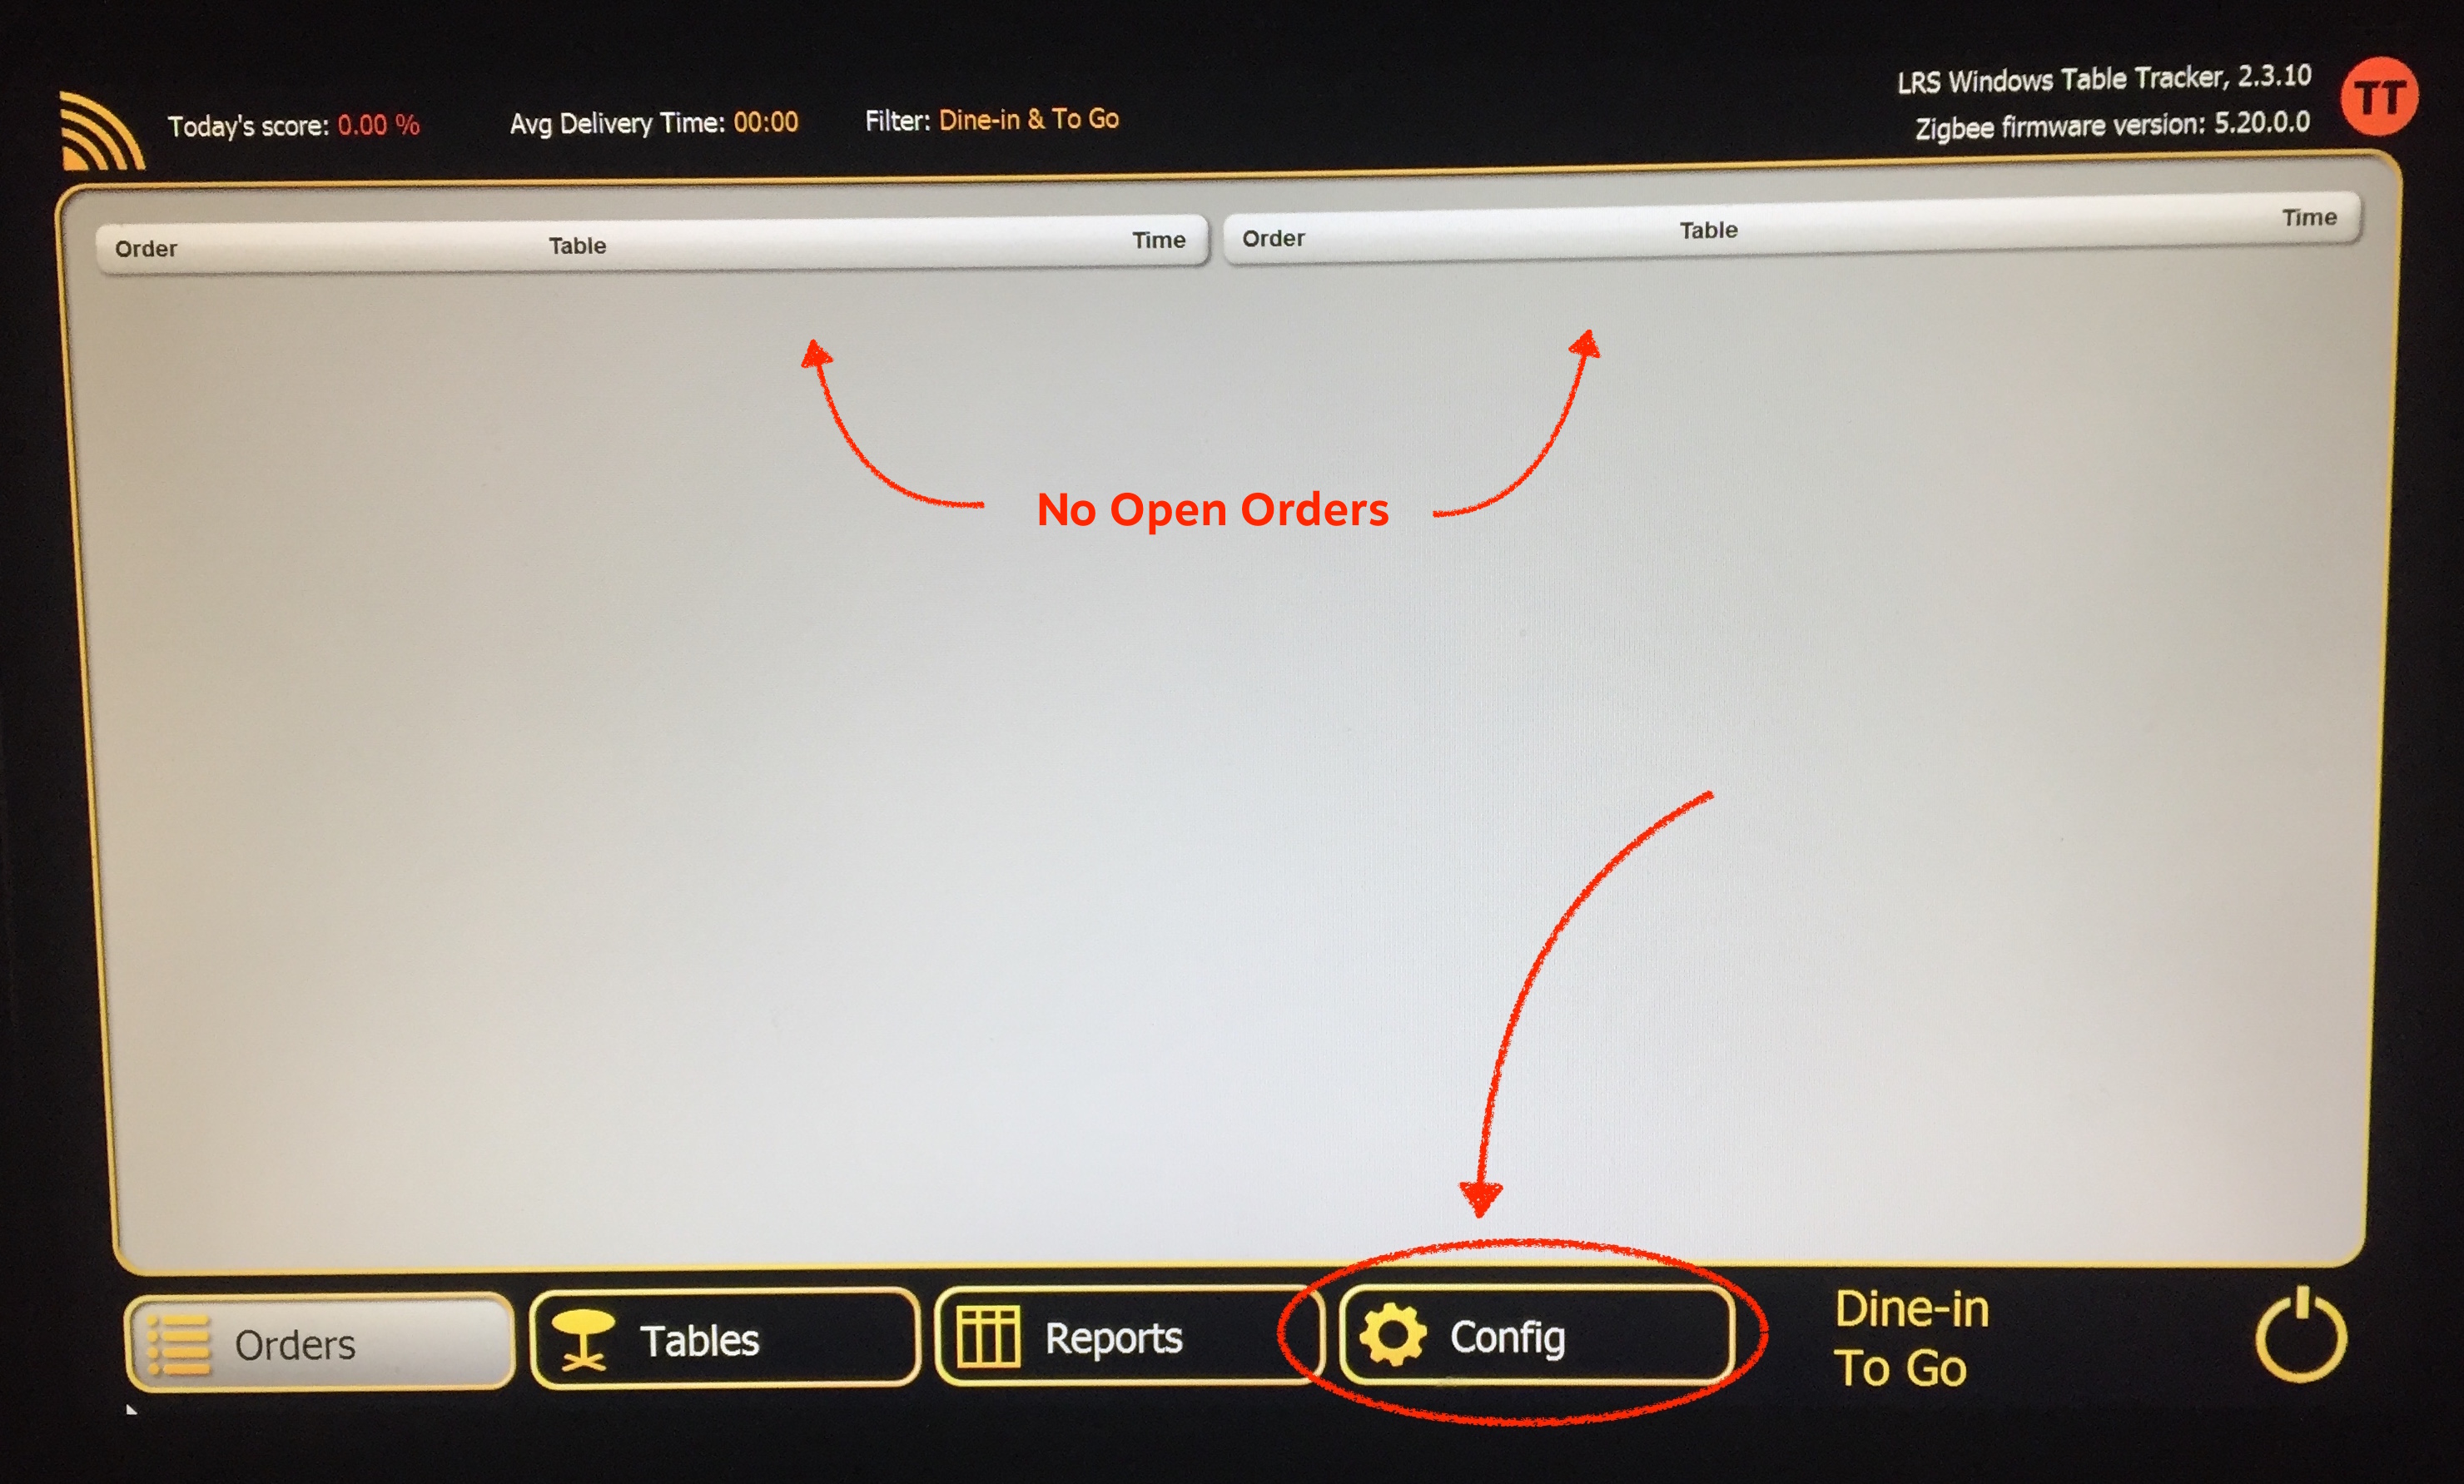
1 - Ensure that there are no open orders on the screen.
2 - Unplug all existing Znodes. New Znodes must be added one at a time.
3 - On your Table Tracker computer, click on the Config button on the bottom of the Table Tracker screen.
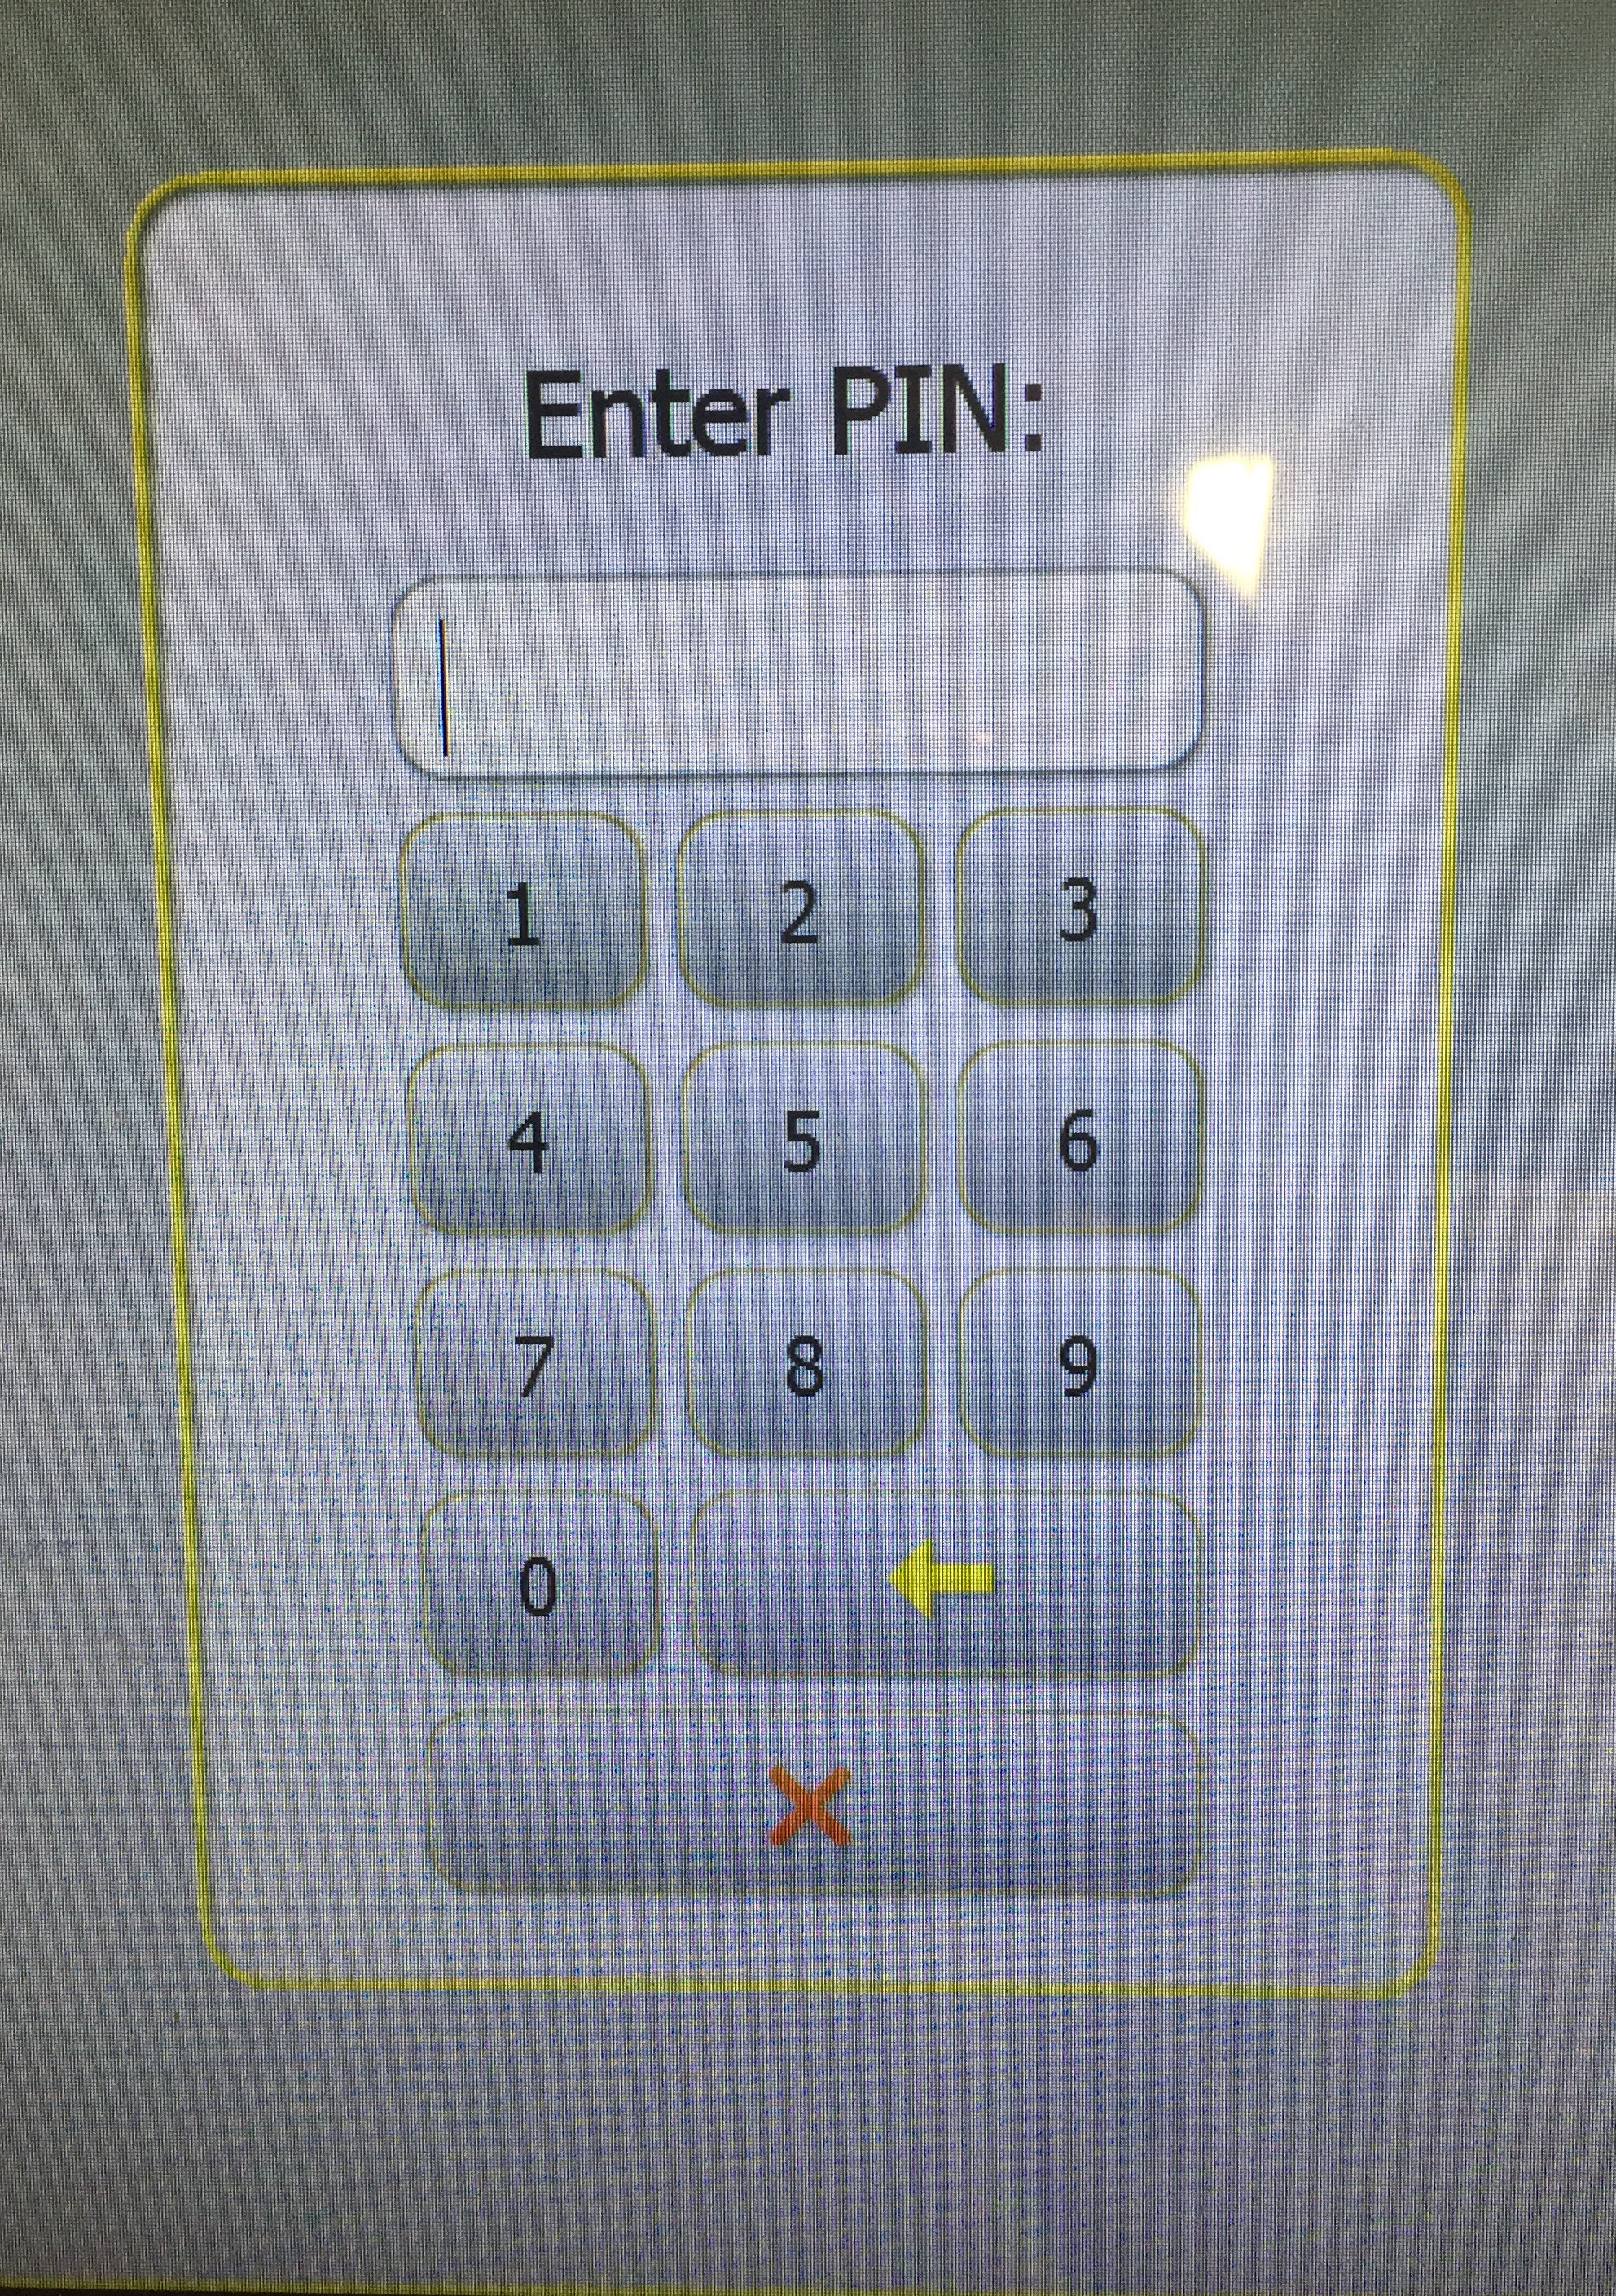
4 - If requested for a passcode, enter it (note that Default passcode is 5, 6, 7, 8, 9).
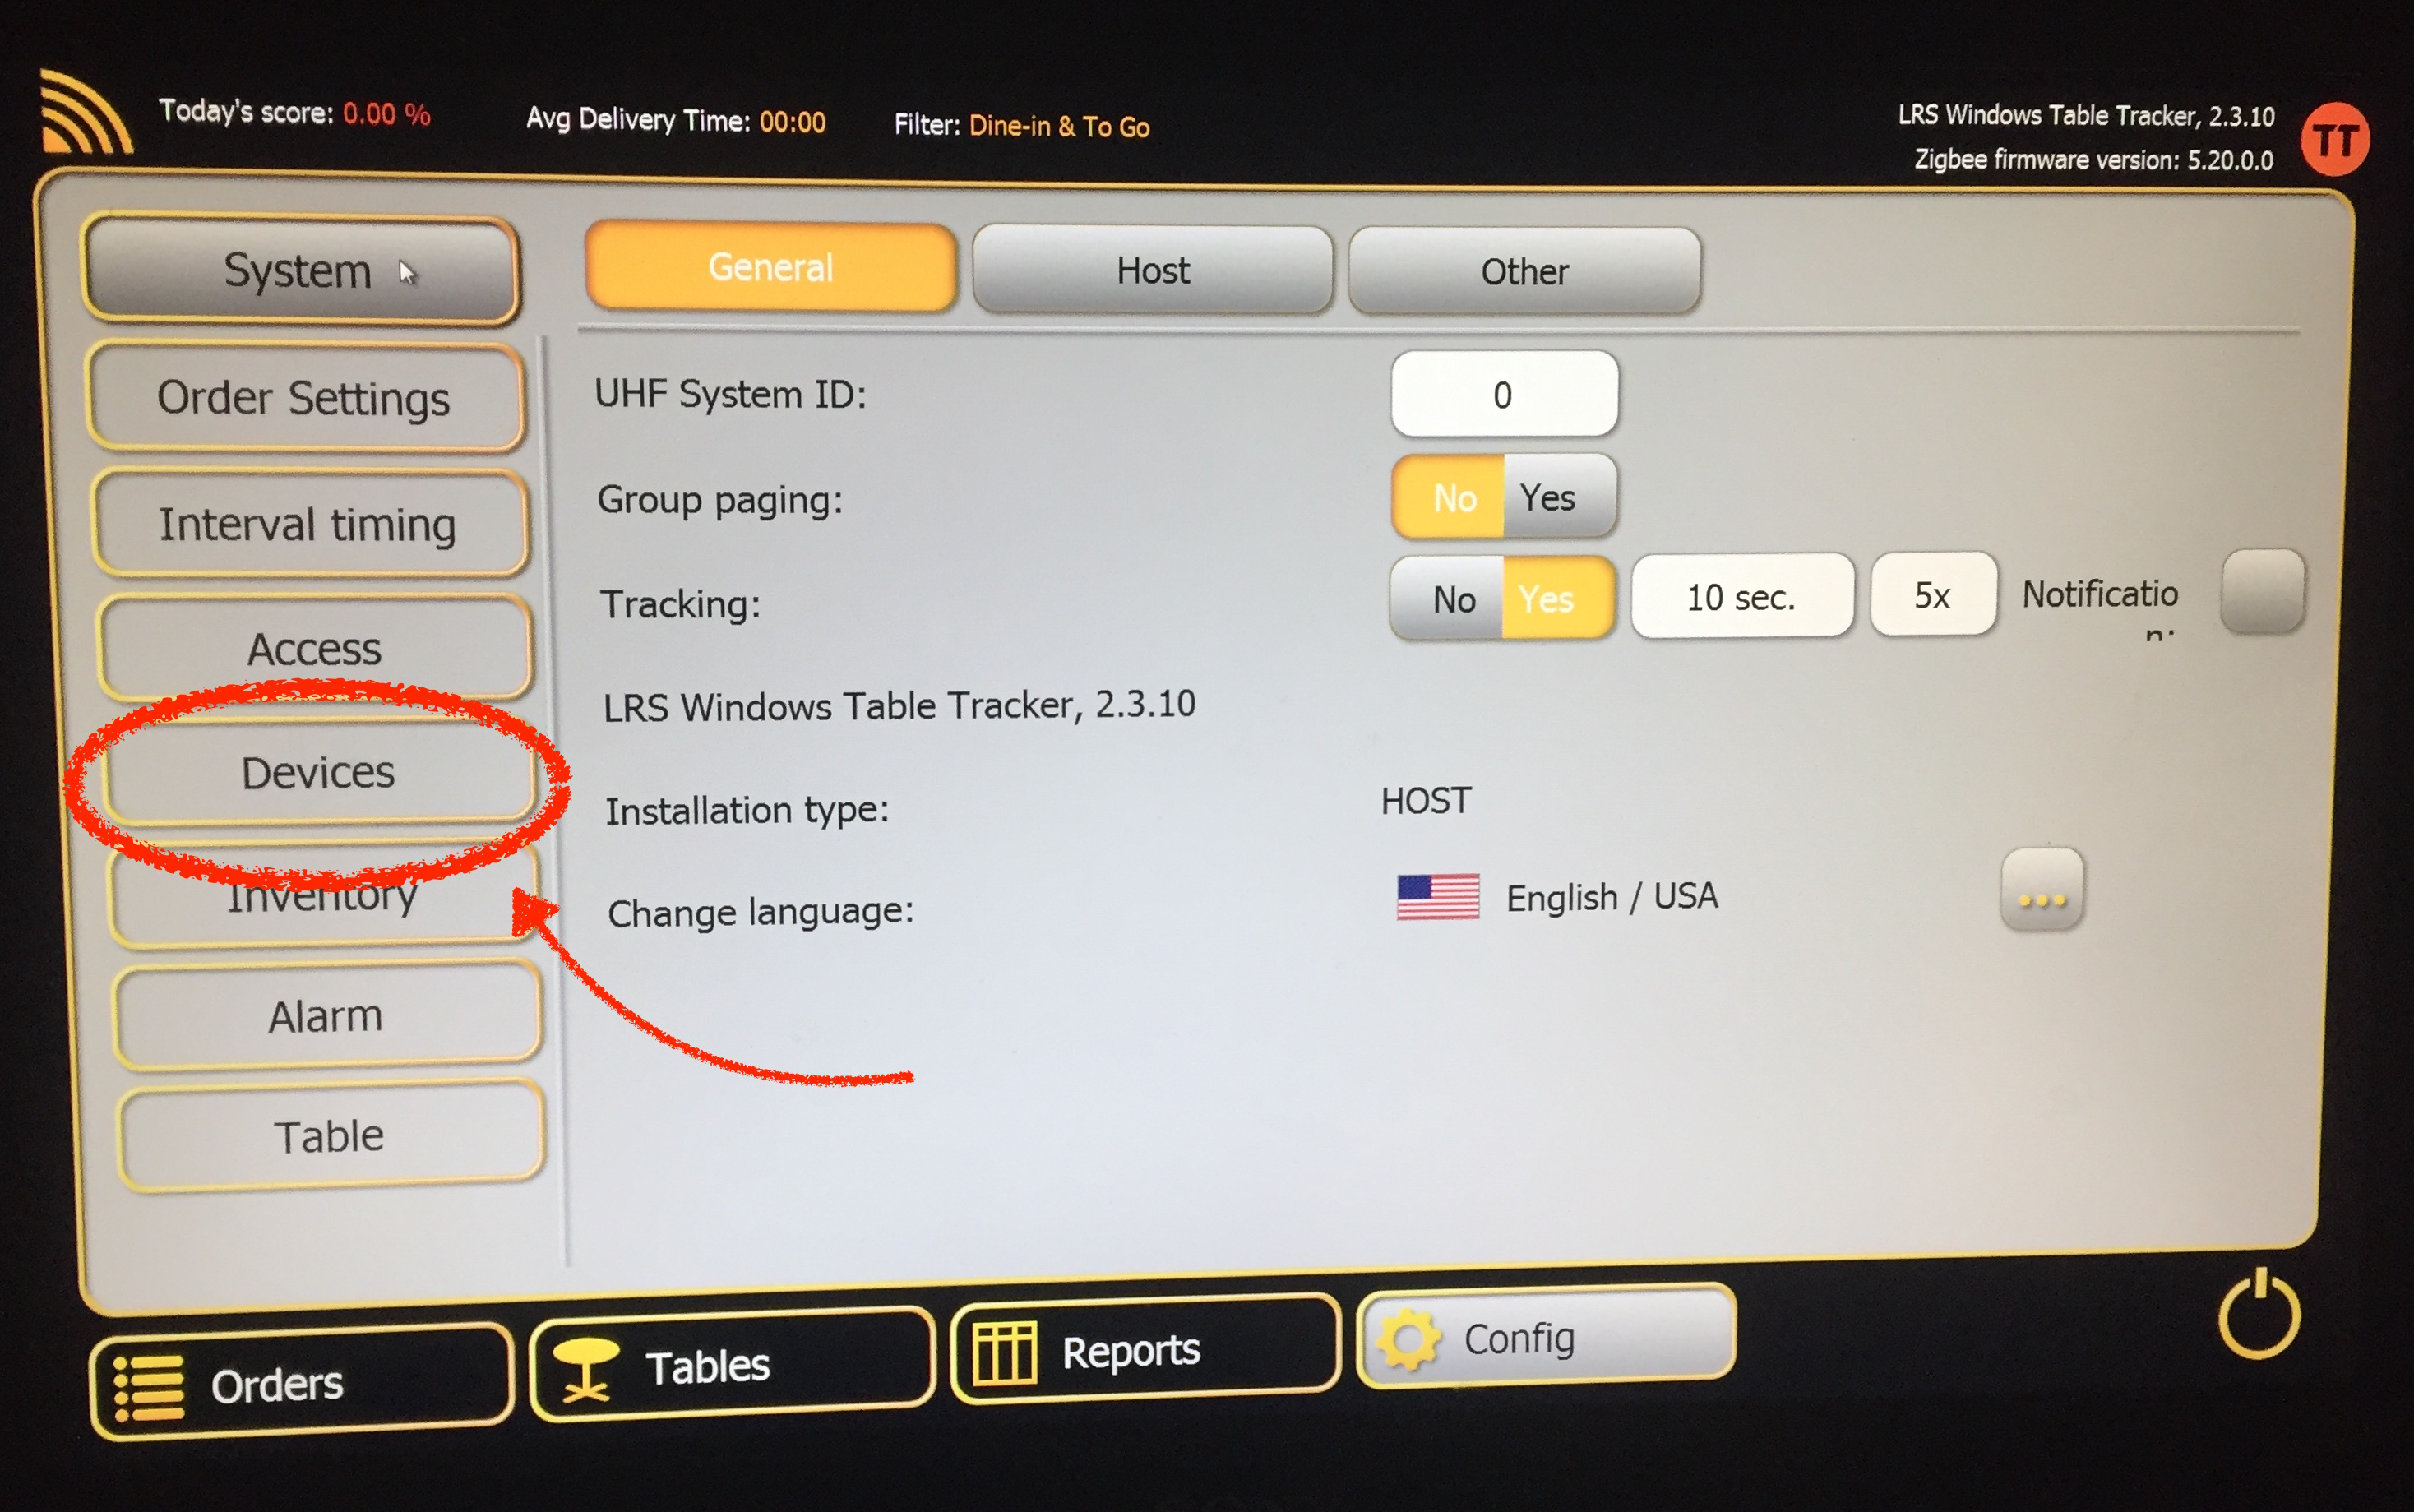
5 - Click on Devices from the left navigation panel.
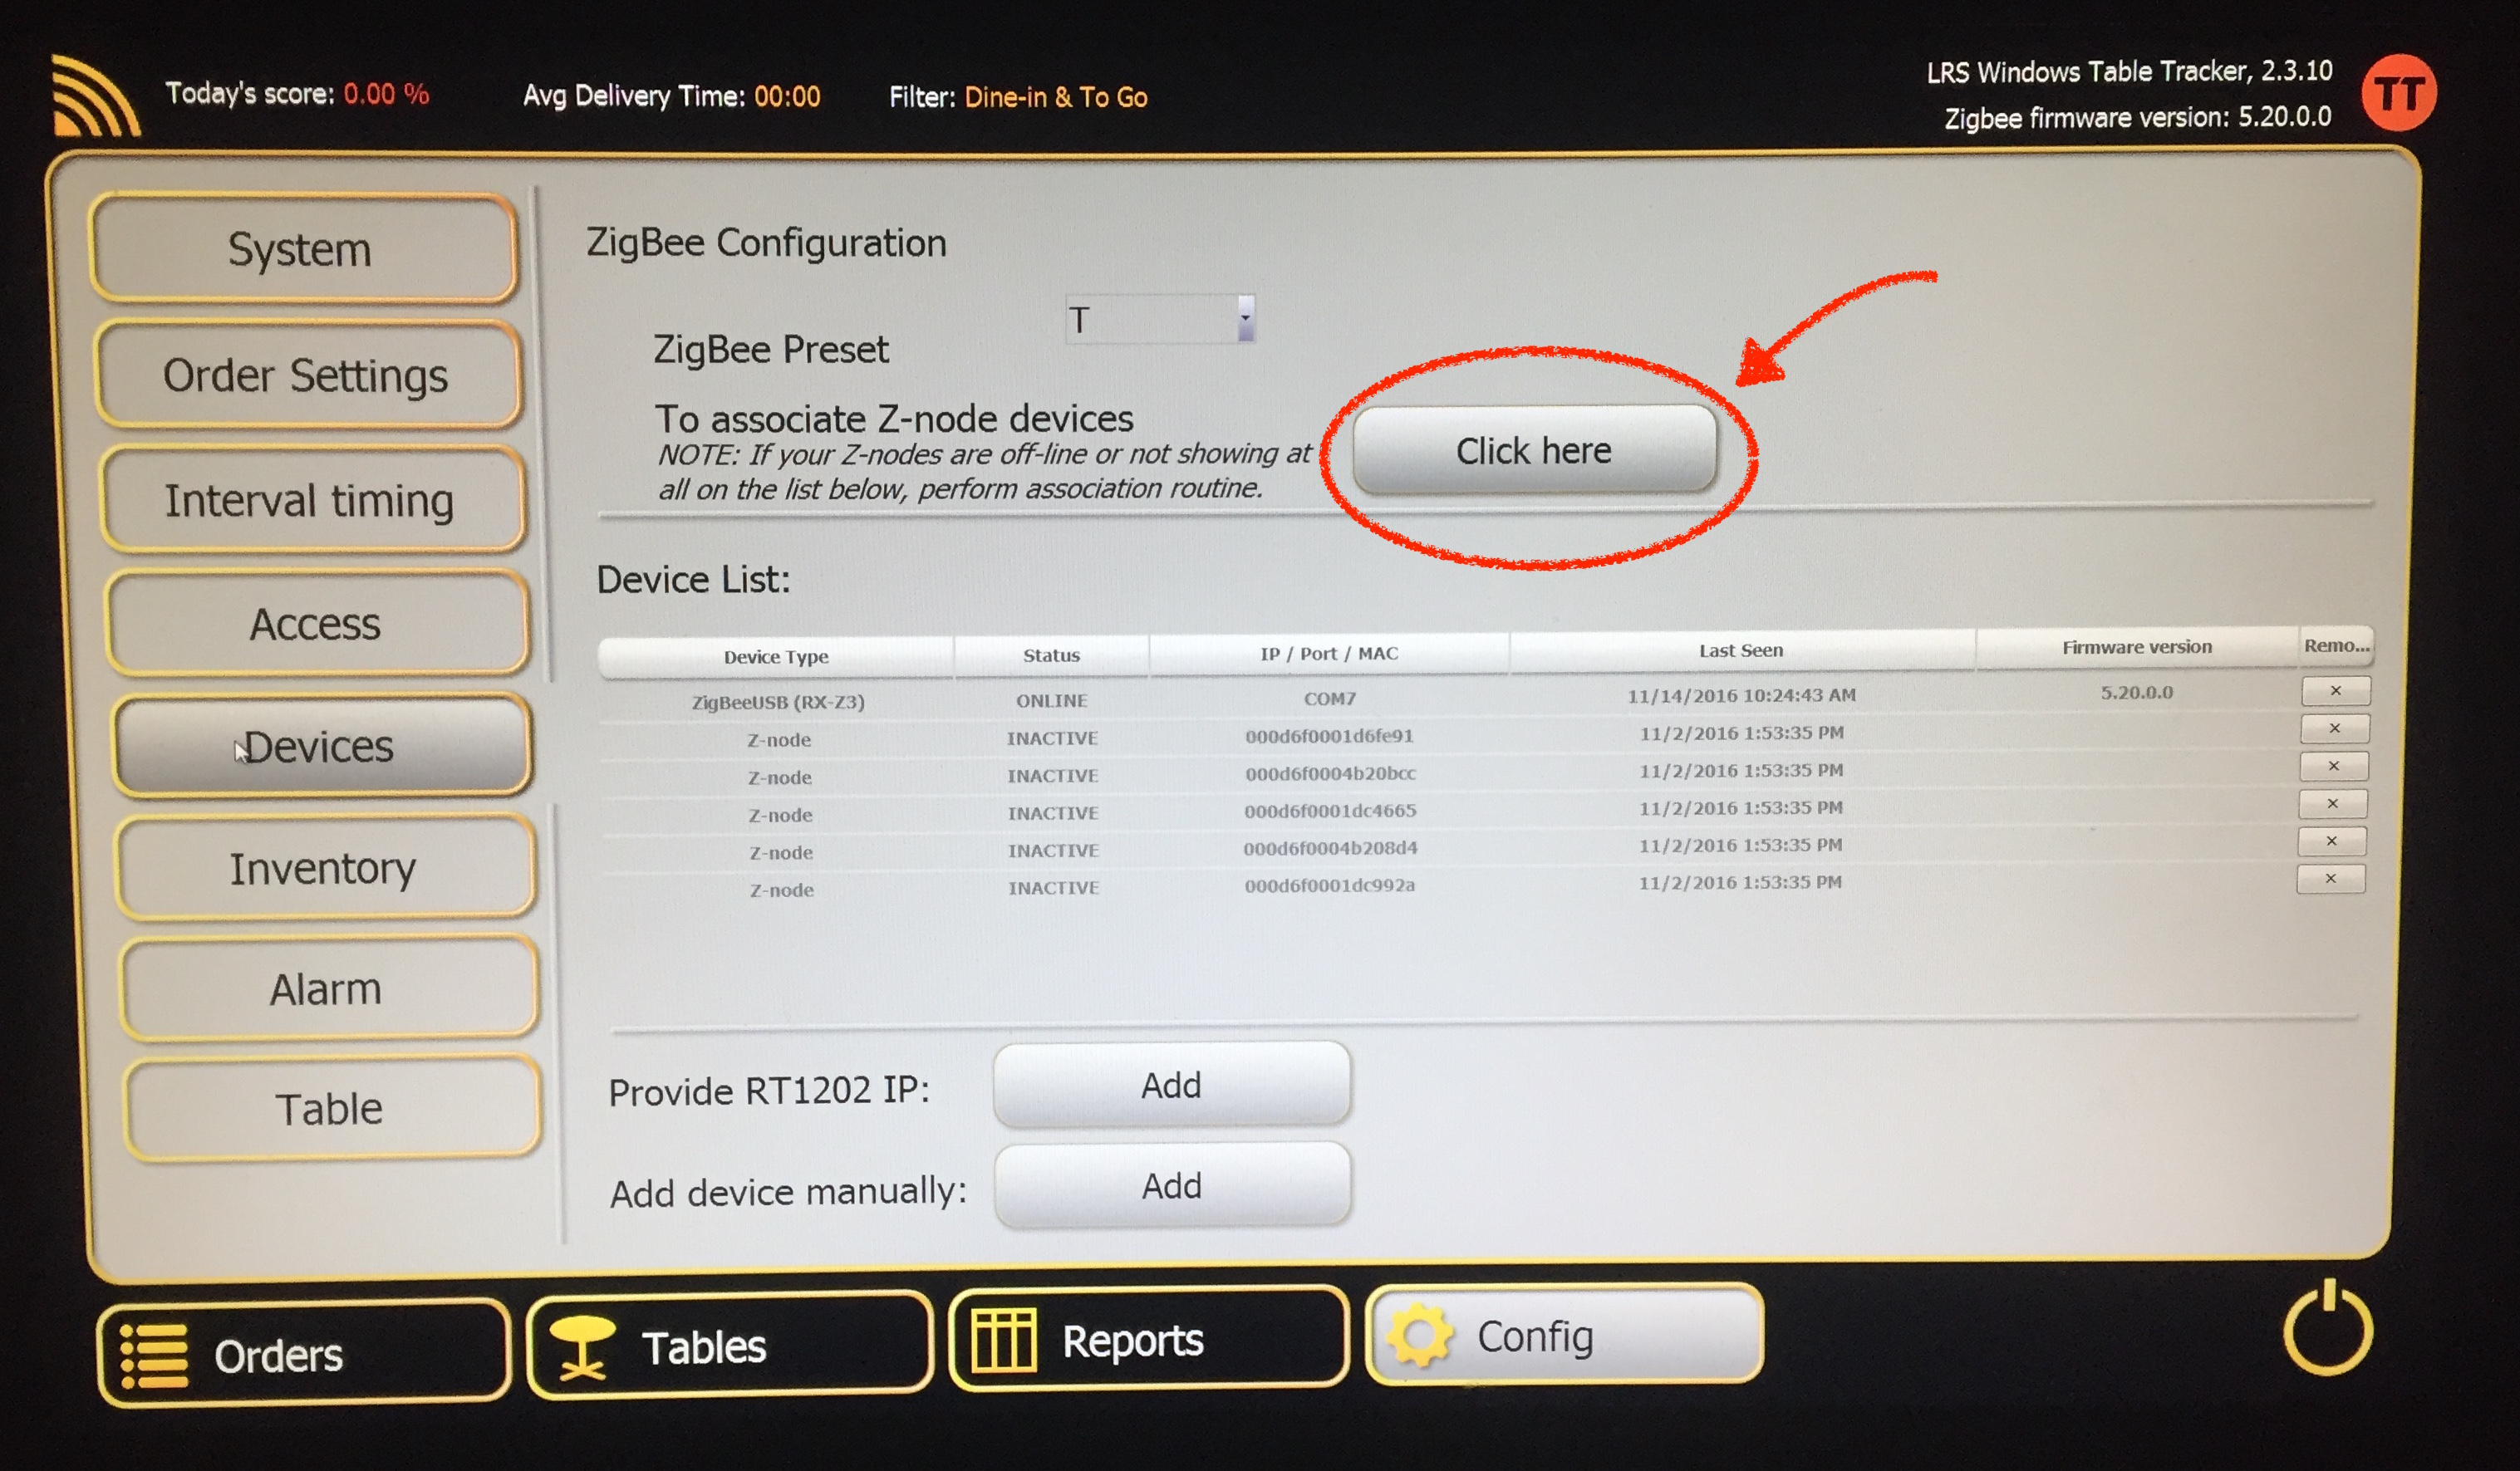
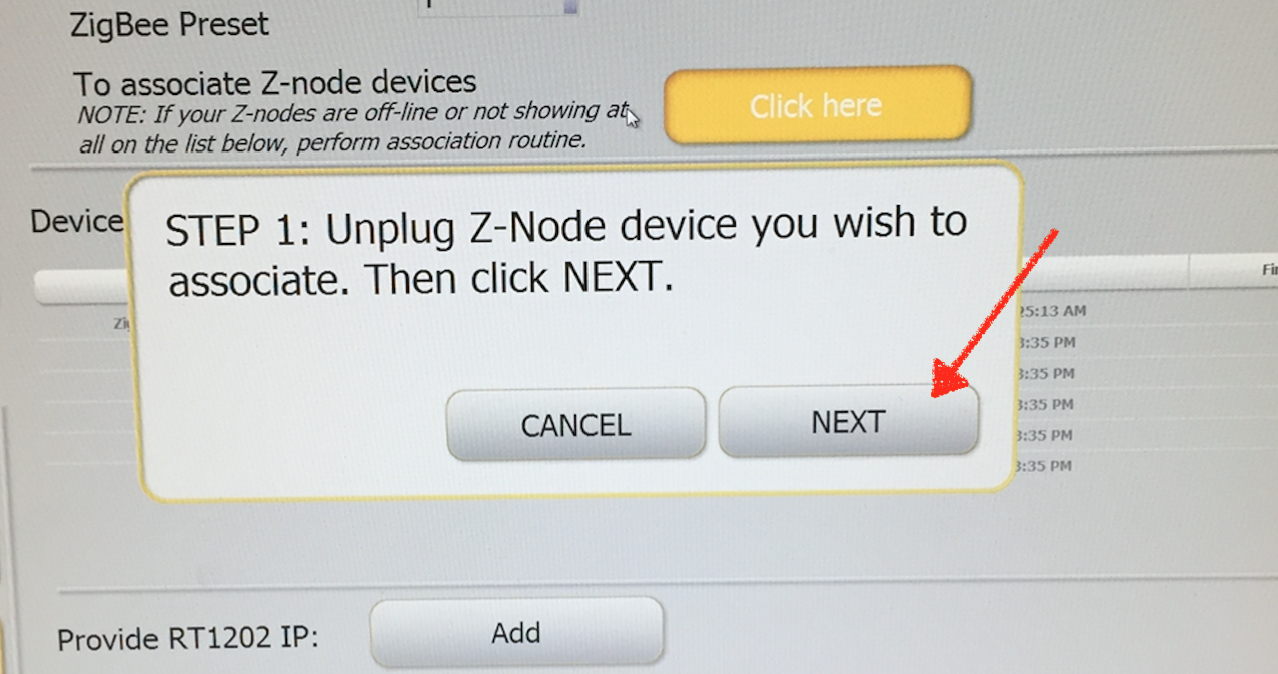
6 - To begin adding and associating the new Znode press on the Click here button.
7 - A modal will appear to walk you through the process now. Press on Next to continue.
8 - Plug in the new Znode.
9 - Press and hold the button on the Znode for 5 full seconds, while plugged. The light on the Znode will be red.
10 - Now, press the button one time, quickly. This will change the light from blue, to yellow, to flashing green very slowly.
11 - At this point, the MAC or Serial for the Znode will be appear on the screen. Exit the modal by clicking on OK and allow the Znode to flash green for 10 seconds to ensure that it was properly associated.
If there are more new Znodes that need to be associated, unplug the newly added one and begin working on the new one starting on step #6
12 - We are now ready to test your Znodes. Plug all Znodes back in and Start all your trackers. If all the orders properly show on the screen then the Znodes have been successfully associated.